Sometimes I make cakes ... usually just for family, and every once in a while for friends. It is fun to take a break from the sewing machine occasionally. :) So here are some of the unblogged cakes of the last year or two:
This mermaid cake was for a friend's party last month. The scary part about making your own cakes is seeing how much sugar goes into them. I make all of my own frosting and fondant, and between the outer fondant and buttercream frosting underneath, this cake contains four pounds of powdered sugar. yowza.
My friend, Sonja, made the super adorable mermaid toppers.
Oscar requested an Iron Man cake for his 4th birthday, which was funny because he really didn't know who Iron Man was at the time. He was delighted, nonetheless.
I really like doing cakes in the shape of letters and numbers. The actual cake carving and assembly can be easy, but frosting them can be a real pain if the are stacked high and thin. I gave up on this number 7 cake and covered it entirely in sprinkles to hide the mess underneath. But it turned out looking pretty festive anyway.
Last year, Sonja's daughter was having a Halloween birthday party, but wanted a Hello Kitty cake. We added some vampire fangs and called it good (this was one of my favorites).
Practice makes perfect(ish). The first time I attempted a ruffle cake for Ruby's birthday, it was way too hot outside (and thus inside, since air conditioning in Santa Barbara is rare), so the icing was sad and droopy (not that she cared). With a little more practice, and better weather conditions, I made a much nicer ruffle cake for Lilly's cowgirl party.
Oscar's soccer team, the Green Dragons, needed a cake for their end-of-season party. Oscar helped me add the decorations on this one, which was a lot of fun.
And most recently, I made another cake for Sonja's daughter's monster birthday party. The monster's "fur" is made using a grass tip, which is very easy, but a bit time intense. It had by far the coolest texture of any cake I've ever decorated! I need to get my hands on more party photos to share with you for this one, because it was a really great party.
Baby Cora just turned two! I guess that means she is not a baby anymore ... but we can just go on pretending, right? The carnival theme came about because 1) when Cora arrived, our lives turned into kind of a three ring circus, and 2) I really wanted to reuse those decorations from Oscar's school carnival. :)
Of course, I used my favorite tool, Silhouette CAMEO for most of the decorations (banners, labels, vinyl, food picks, etc). There are a few days left to enter the giveaway, and your odds are pretty good! Also, I'll be posting the Black Friday deals on Thanksgiving day this year, so watch for that. This sale is going to be the best they've ever offered, so you won't want to miss it.
I have to say, serving brunch was the easiest party food yet. We skipped the cake all together and just served mini-doughnuts.
For the rest of the spread, we had mini quiche, croissants, sausage, tiny yogurt cups, little pancake stacks, and apple fritter bread (which is crazy delicious, and you should totally try the recipe!).
The pancakes were my favorite.
But you know what was really my favorite from the party? This girl. She is a total nutter, and we love her to bits.
I made her a Geranium Tunic using the Children on Parade fabric by Sarah Jane. I've been hanging onto it for a while, so I don't know how easy it is to find now. It is one of my favorite fabrics ever!
So all it all, it was just a really fun morning where we ate ourselves sick and clowned around.
(I have a great Silhouette Promotion to share with you today. If you have no interest in Star Wars (huh?) and just want the deal, scroll to the end of the post).
I've always had a healthy appreciation for Star Wars, but having a mega fan little boy (and husband), I have now been thoroughly indoctrinated. It came as no surprise to me that Ocsar wanted a Star Wars party, and he had grand plans for a snowy, Hoth-themed celebration. Everyone could wear white! We could cover the whole yard with snow! I had to talk him down a bit.
I made a simple e-vite and added a personalized Star Wars intro using the free Star Wars Crawl Creator.
Sorry, quick moment of nostalgia here ... can you believe Oscar is already 5?!! It all goes by so fast.
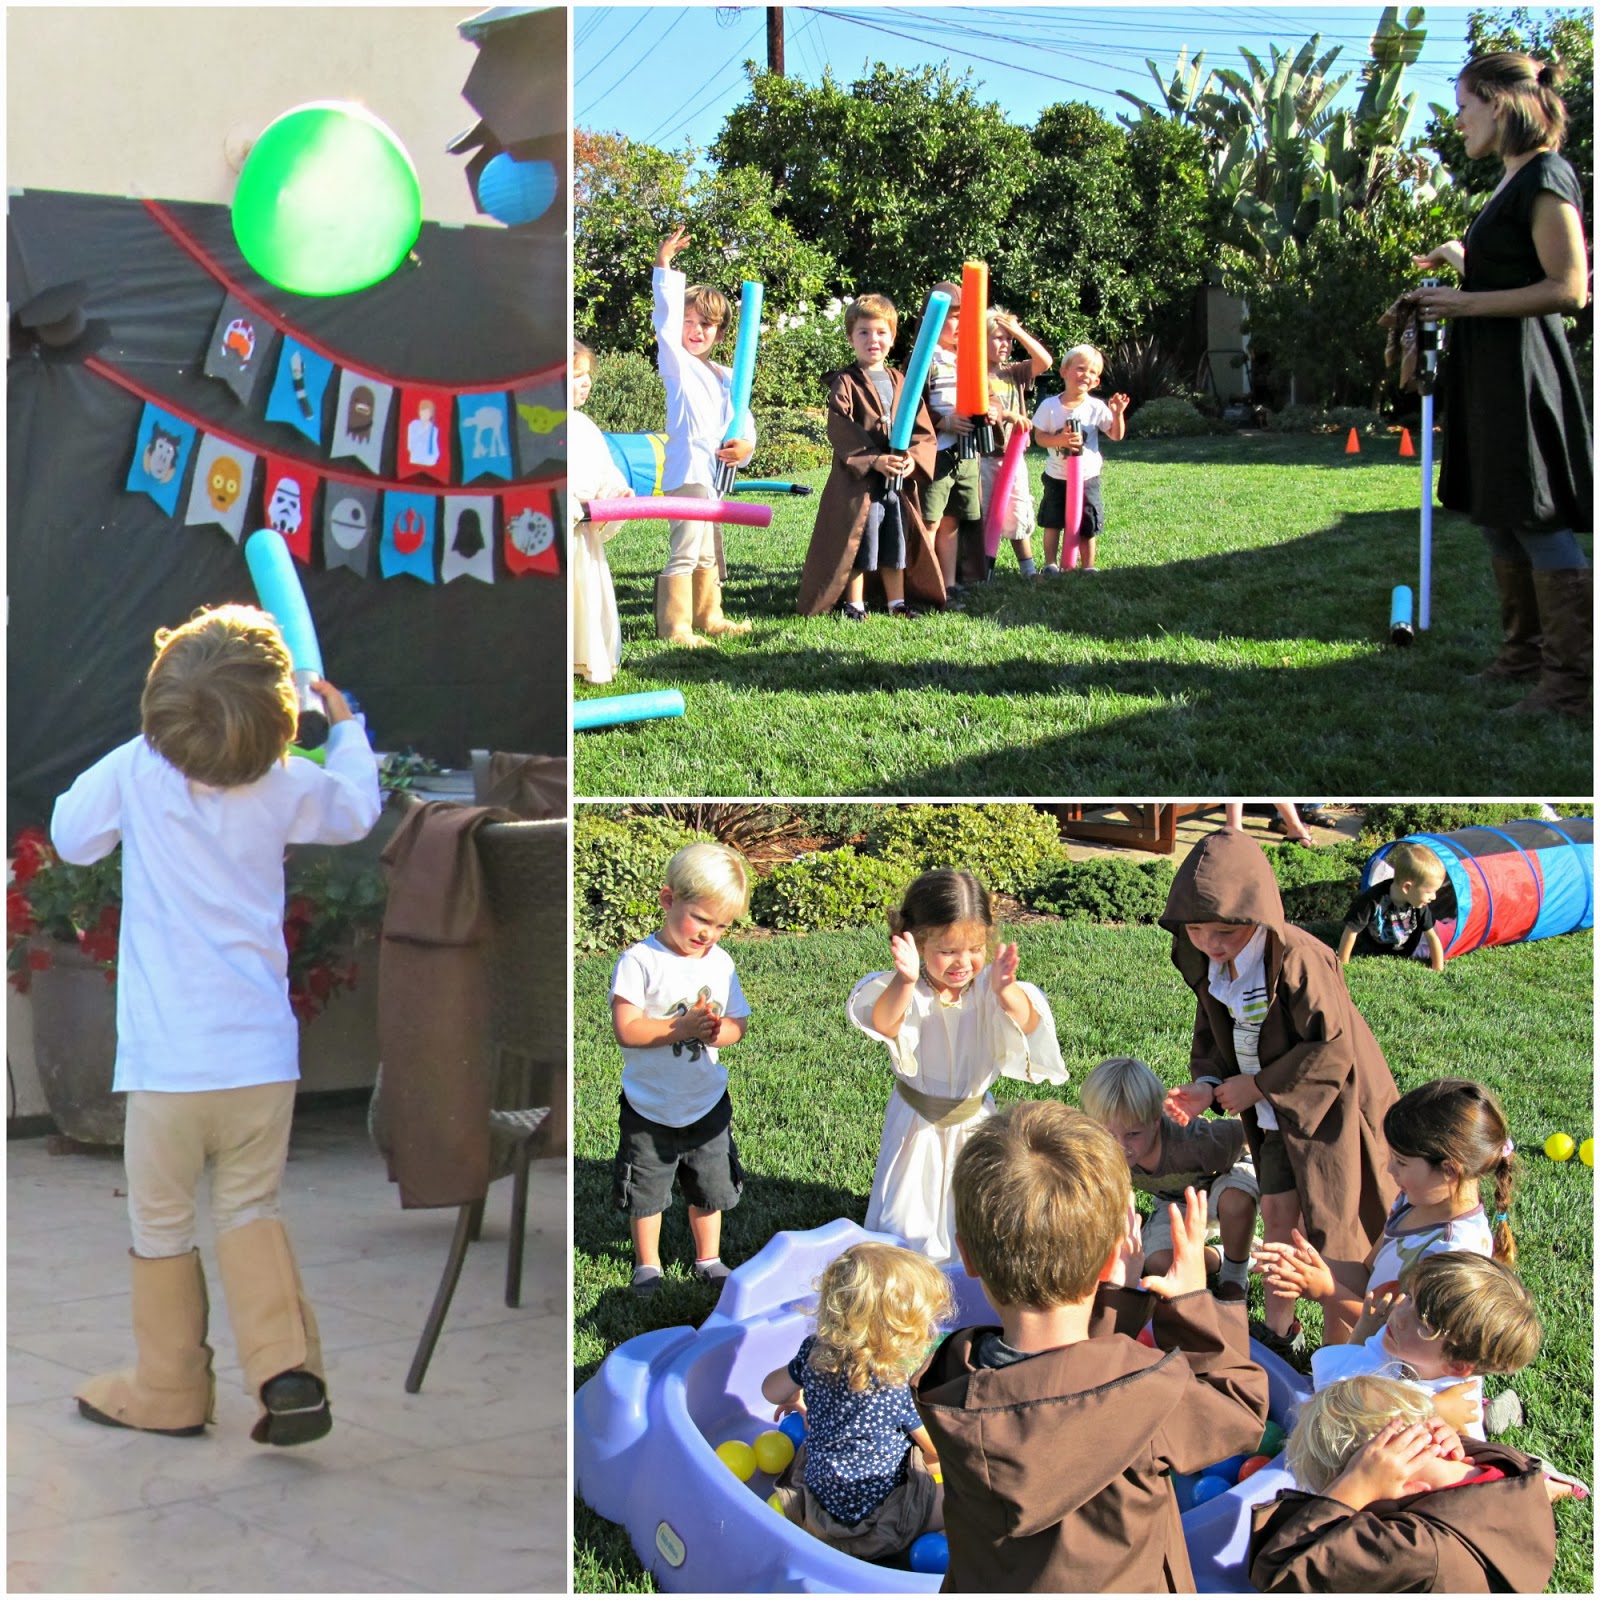
Ok, back to the party. When the young padawans arrived, they each received a Jedi robe and light saber. Dana's Beach Robe pattern was my base, and I Jedi-fied it by widening the sleeves and adding a bunch of length. To save time, I just serged all the edges (no hemming, yay!). There is a button and elastic loop on the front to keep it closed. The lightsabers are the standard pool noodle and duct tape variety. The kids love them and they are pretty safe.
Most of the kids at the party had never seen Star Wars, so "Jedi Master Jill" gave a brief rundown of Jedi and the good side of the force, and they ran through a series of tasks. The padawans had to jump some cones, crawl through a tunnel, rescue a toy R2D2 from the swamps of Degobah (a kiddie pool "ball pit") with their eyes closed, and keep a balloon in the air with their lightsabers.
Once everyone successfully completed their Jedi training, we headed over to the "Tatooine Parlor" to be branded with the Jedi emblem. I used Silhouette Temporary Tatoo paper(affiliate link) to make the tatoos. This is a really cool specialty media from Silhouette, and you don't really even need the cutting machine to use it. You simply choose a design, print on your home computer, apply the adhesive sheet, and cut (by hand or machine).
I didn't go too crazy with decorations for this party, because I knew the kids would mainly be running around with the lightsabers. We strung some mini lanterns and balloon Tie-Fighters, and I dressed up the umbrella pole to look like a lightsaber.
The main decoration was this felt Star Wars bunting, which I I totally copied from Sticks on a Plane. She made the world's coolest Star Wars nursery, and that little bunting spoke to me. I copied most of Amanda's characters, and then did a google search for Star Wars graphic images to create templates for the rest. I kept this decoration a surprise for Oscar, and now it hangs on the wall over his bed. I think this is my favorite element from the whole party.
Food at the party was pretty simple, because this was more of a kid party than a big family barbecue. We had Lightsaber fruit kabobs (which Jared cleverly renamed Obi-wan Kabobies), Cloud City Crudites, Jabba Jello Jigglers, and Empanada's Apprentice Italian sausage hot pockets. My mother-in-law helped me crank out lots of little Darth Vader (sausage filled) and Stormtrooper (ham and cheese filled) hot pockets, using pie dough for the crust, and Williams Sonoma Star Wars cookie cutters (as seen at A Mama with Ideas). Oscar LOVES these things. All the moms and dads thought they were yummy, too. :)
Those cookie cutters served double duty, because obviously we needed to use them for their intended purpose. And the cookies come out so cute, you don't even have to frost them. I used my favorite sugar cookie recipe, and for the chocolate ones, used the same recipe, omitting the almond extract and adding 1/2 cup cocoa powder. They are sooo good, I'm having a really hard time staying away from the left overs.
I always decorate our drink dispenser for parties, but this R2 unit is my favorite vinyl "costume" to date. I cut the vinyl on my Silhouette Cameo, and applied it by hand (I find transfer paper is a little tricky on curves). If you want my R2D2 vinyl file, just shoot me an email (homemadebyjill@gmail.com)! The "head" is just a metal mixing bowl set over the top of the drink dispenser and secured with a little tape.
Other Silhouette media projects included these cute storm trooper favor box labels, made with thePrintable Silver Foil labels(affiliate link). This is one of my favorite specialty media products by Silhouette, because the labels look SO polished. I wasn't sure how color would show up against the foil, but it was vibrant and looked fab. This is definitely a product you could use without the machine, and would be wonderful to use on holiday treats.
I filled the boxes with Star Wars rings and pop rocks candy for each of the guests and their siblings. I was feeling stingy with my cute chevron boxes, so I just packed one for each family instead of each kid.
I used the Printable Clear Sticker Paper(affiliate link) to add Darth Vader to the kid's drink cups. This sticker paper is quite thick, and would look great against glass. It worked on my cups, but would look better on a nice smooth surface, I think.
I also made the star straw toppers on my silhouette using a pencil topper shape from the online store. You have to shrink the shape down a bit to make the holes a good size for straws, but they were pretty cute. It's all in the little details!
Darth Vader (a.k.a., Darth Daddy) showed up and tried to steal all of our pinata candy. He tried to bring Oscar to the Dark Side, promising the pinata candy would bring them great power, but luckily, Oscar was able to resist. He and the other young Jedis gave ol' Darth a good pummeling with their lightsabers, and he surrendered.
I made the Darth Vader costume by ironing on a chest plate image I found online to a long sleeve t-shirt, and sewing a big piece of fabric into the shoulders as a cape. We ordered the accessories from amazon.
Oscar really had his heart set on a Star Wars pinata, but there isn't much available to buy at a reasonable price. Luckily, Oh Happy Day has a whole series about how to make your own pinata, so I just made this one myself. It was so easy! All I needed was a box, painters tape, craft glue, and crepe paper. I added a bit of cardstock for the features. I think it took like two hours to put together, and Oscar was even able to help. The kids did a great job smashing it open, but the face remained intact, so we saved it and hung it on Oscar's wall.
The only thing that held out from the original Hoth party theme was this Wampa Cake, which I saw on Alicia Policia. If you love Star Wars, definitely check out all of her Empire Strikes Back party posts. It looked amazing (and had the coolest pinata I've ever seen. Pinata Luke's hand was detachable. I'm serious.).
It was a very Hoth-y birthday after all.
Many thanks to all our friends who came and made this birthday boy's wishes come true! Also, big thank you to my mother-in-law for all of her help with the food prep (you always save the day!), my husband for being a very punny Darth Vader, and my good friend Sonja for helping me with so many of the crafting details behind the scenes. She should get a blog, don't you think? :)
On to the Silhouette promotion!
You may have noticed that I reference my Silhouette Cameo and specialty products a number of times in my party posts. Aside from my sewing machine, it is my favorite crafting tool! It elevates the quality of my projects and just plain saves time.
Visit the Specialty Media Promo Page(affiliate link) and use the code JILL at checkout to access these great deals:
Silhouette Cameo Specialty Media Bundle for $269.99
or
Silhouette Portrait Specialty Media Bundle for $129.99
So, what comes in the bundle, you ask? You choose your machine, and it comes with:
1 cardstock essentials pack
1 pack printable adhesive kraft paper
1 pack printable clear sticker paper
1 pack temporary tattoo paper
1 pack printable cotton canvas
1 pack chipboard
1 pack printable silver foil
1 pack printable magnet paper
1 pack double-sided adhesive
Basically, you are getting about $30 discount on the machines and $70 worth of free product. It's a good promotion. :)
If you don't need the machine, all Specialty Media is 30% off!
Like I said before, if you don't have to own a Silhouette machine to use the cool specialty media. While I would recommend choosing simpler shapes to cut by hand, the media all works the same ... just print your design and cut it out! I'll be sharing other specialty media projects throughout the promotion to show how neat this stuff is.
Saturday we hit off Oscar's "birth week" (because apparently he takes after his mom and likes to drag out the celebrations as long as possible) with a playgroup birthday party. All the babies in our playgroup were born within about two months of each other, which, in addition to making it super fun, gave us a great excuse for a big group party.
I made a number one cake, taking inspiration from the B cake on Blonde Designs Blog. I made mine two layers and spread a delicious raspberry filling in the middle: