I was over the moon when Silhouette contacted me about doing a second giveaway. It was love at first cut when I tried it for the first time last June, and now it easily ranks in my top 5 favorite crafting tools. I use it for everything - party decorations, wrappings for baked goods, gifts, gift tags, clothes for my kids, etc, etc. It is already coming in really handy (and saving me money) this holiday season for decorations and gifts.
Here are the Silhouette projects I've had up my sleeve lately:
I cut fall leaves to attach as gift tags to yummy pumpkin bread loaves - a great way to dress up your baked goods for gift giving and customizable to any occasion or season. I cut my leaves nice and large, so there was plenty of room to write a note on the back.
The women's group at my church made 30 sets of Christmas Advent Blocks, using instructions I found at How Does She? We mod podged the blocks with cute holiday papers and applied vinyl numbers and lettering that I cut on my Silhouette. At a cost of only $2 per set, this makes a great small gift for just about anyone on your list.
My friend, Sonja, recently threw a Sesame Street/Elmo themed party for her daughter's second birthday. She loves paper crafts and was painstakingly cutting out all her Elmo decorations by hand, until I reminded her of my magical machine that cuts whatever you want. In no time, we had cut alphabet and number garlands and some Oscar the Grouch, saving her time and money.
My Oscar was appropriately grouchy at the beginning of the party until he was allowed to wander off with one of the table decorations (which was filled with "Dorothy"goldfish crackers).
Did you know you can import pictures from the internet or your camera to the Silhouette cutter? You aren't limited to the (thousands of) images in the online store. Which means you can cut anything you want. Which is awesome.
I made lots of onesies over the summer using the Heat Transfer material, and now I am using it to make custom t-shirts for Christmas gifts. I applied this dinosaur silhouette to one of Oscar's shirts - the tail wraps around to the back.
If you want to make your favorite guy a gift this Christmas, the Heat Transfer is a great option. It is easy to do and looks so professional. The hardest part is just picking the design he'll love most!
Ok ... so my new favorite thing to make with the Silhouette is temporary tattoos. My nephews are all getting silly mustache finger tattoos in their stockings this year.
You actually don't need the Silhouette cutter to make the tattoos - you can buy the tattoo paper, print from your home office, and cut them out with scissors. So if you're looking for the perfect stocking stuffer for your Justin Bieber-crazed tween, or tough to please 9-year old boy, some fun temporary tattoos might be your perfect solution.
If you still aren't convinced this is the best cutter out there, here are some links to my past projects:
So ... on to the giveaway! One very lucky winner will receive their very own Silhouette SD Machine(a $299.99 value). The package includes:
a Silhouette machine
Software for Windows XP/Vista, Mac
Power cable, USB cable
2 Cutting mats (one for thick media, one for thin media)
One cutting blade
$10 gift card to the Silhouette Online Store
This giveaway is now closed. Thanks for entering!
You know you want it! Let's keep things simple ... there is only ONE way to enter:
Browse the Silhouette website and check out all the amazing things this one machine does. Then come back and leave a comment on this post by November 26th telling me how you'd use your new favorite craft tool for the holidays.
The winner will be randomly selected and announced on November 29th. This giveaway is available only to U.S. residents (sorry - international readers! There are customs issues with the blade. I'll have other prizes available to you later in the week).
There are three little rules:
There is only one entry per person. If you accidentally enter more than once, please delete your duplicate comment (you will likely have to scroll to the end of the comments to view yours).
Make sure I have a way to contact you! Either your profile must link back to a public blog, or you must leave me an email address to contact you. Anonymous comments (with no contact information) will be deleted.
You can only win one Silhouette. If you have won a Silhouette here or anywhere else in blogland, you are no longer eligible.
I'm also excited to announce a special Cyber Monday deal!
It is only valid on Monday, November 29, 2010, starting at 4 am and ending at midnight the same day.
Here's the deal ...the Silhouette will be sold for $199 (originally $299). Silhouette America has NEVER sold these cutters for this cheap! This is the newest version with more capabilities and newest technology - the Silhouette is now Mac compatible.
It gets better ... the Cyber Monday deal will also include:
1 Roll of Cream vinyl ( $7.99) 1 Roll of transfer paper ( $7.99) 1 Home decor CD (Value $55) Total ($70.98)
All for only $199 - almost $200 in savings!
I'll have the discount code posted bright and early next Monday at 4 a.m. Eastern Standard Time.In the meantime, leave a comment and keep your fingers crossed to win!
We had such a fun time at Oscar's birthday party this weekend - I have tons of photos, but I still need to go through them, so I'll share party details later this week.
Meanwhile, want to see all of our costumes?
I made Jared a quick and easy robot costume by covering a large cardboard box in silver duct tape and cutting a bunch of vinyl decals with my Silhouette machine. He really hates dressing up for Halloween, but he was sweet to humor Oscar (and me) for the party.
You've already seen Oscar's pumpkin costume. It was too hot on Saturday to stuff him full, but we might try that for trick or treating tonight. He was such a happy birthday boy. The ear-to-ear smiles he wore all night made all the party prep worth it.
I made a pregnant pumpkin shirt with a simple freezer paper stencil and the new Martha Stewart Glitter Paint. Not an elaborate costume, I know, but it was about all I could muster and it made Oscar happy. We felt like a pretty cute pair of pumpkins.
Here's our happy gang all together. Ruby was Wonder Woman, and I am thrilled with how her dress came out. She even wore the accessories happily, which was a miracle. I'll post more on her outfit later.
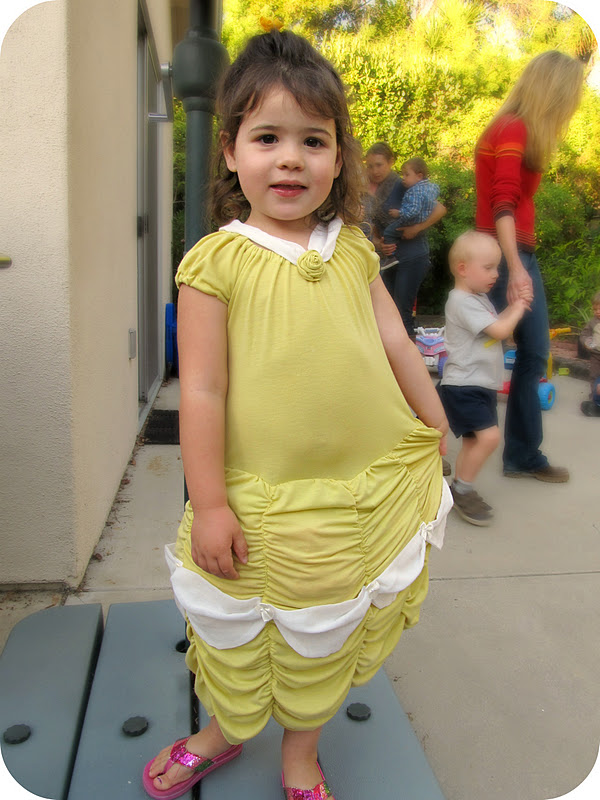
I also made the costume for our friend Audrey (Oscar's party companion), as her birthday present. She loves Beauty and the Beast, so I made her a Belle dress using the Crafterhours tutorial again. Her baby sister wore Ruby's old Belle dress, so we had two little princesses running/crawling around the party.
I hope you have a very happy and safe Halloween! Don't make yourself sick with candy. :)
So have you heard the news? They have just released a new version, the Silhouette CAMEO. She's a sleek little thing...
The biggest change is the increased cutting size. The Cameo cuts paper, cardstock, vinyl, or fabric up to 12 inches wide (verses the SD's 9 inches) and 10 feet long. The extra 3 inch width allows you to cut significantly larger designs - you can see the difference in the cutting mats below. I love that I no longer have to trim down 12 inch scrapbook paper before running it through the machine.
Other improvements include a quieter motor and an adjustable cutting blade. I'm a big fan of the new blade, because I was always losing my blade caps on the SD. Now I can change the cutting depth with a simple click. Yay! I also find that it is much smoother to load materials, particularly the vinyl. All in all, it is just a new and improved version of an already awesome machine.
The nice Silhouette folks also sent me one of the new starter kits to try out. There are starter kits for vinyl, heat transfer, fabric ink, and rhinestones, and include all the tools you need to learn and make a new project.
So far, I've kept my Cameo busy with party prep - Oscar is having a Halloween themed birthday party this weekend, and my machine is working overtime.
First, I used the Vinyl Starter Kit to decorate a beverage dispenser for the party. It's going to look awesome filled with colorful, Halloween punch.
I also cut a little vinyl wall decal for a blank space near one of the food tables. The party will actually be held at my friend's house, because our kids are having a joint party. Vinyl is great for making easy, temporary decor - I didn't feel bad plastering her walls with Halloween stuff, because I know it will peel right off when the party's over.
Paper buntings cut from scrapbook paper spook-ify my otherwise plain cake stands. I can't wait to load them up with treats!
If you've been saving your pennies for a craft cutter, I can't say enough good things about the Silhouette Cameo. And since I love sharing a good deal, you can get one of the new Cameos plus your choice of a free starter kit (Fabric Ink, Vinyl, Heat Transfer, or Rhinestone) for $299, using the online promo code, JILL.
This promo runs starting today, October 25, through October 31. There are a limited number of promotion bundles for the first shipment of Cameos, and they are expected to sell out. Maybe it can be an early Christmas present for yourself? I'm sure you deserve it. :)
(I have a great Silhouette Promotion to share with you today. If you have no interest in Star Wars (huh?) and just want the deal, scroll to the end of the post).
I've always had a healthy appreciation for Star Wars, but having a mega fan little boy (and husband), I have now been thoroughly indoctrinated. It came as no surprise to me that Ocsar wanted a Star Wars party, and he had grand plans for a snowy, Hoth-themed celebration. Everyone could wear white! We could cover the whole yard with snow! I had to talk him down a bit.
I made a simple e-vite and added a personalized Star Wars intro using the free Star Wars Crawl Creator.
Sorry, quick moment of nostalgia here ... can you believe Oscar is already 5?!! It all goes by so fast.
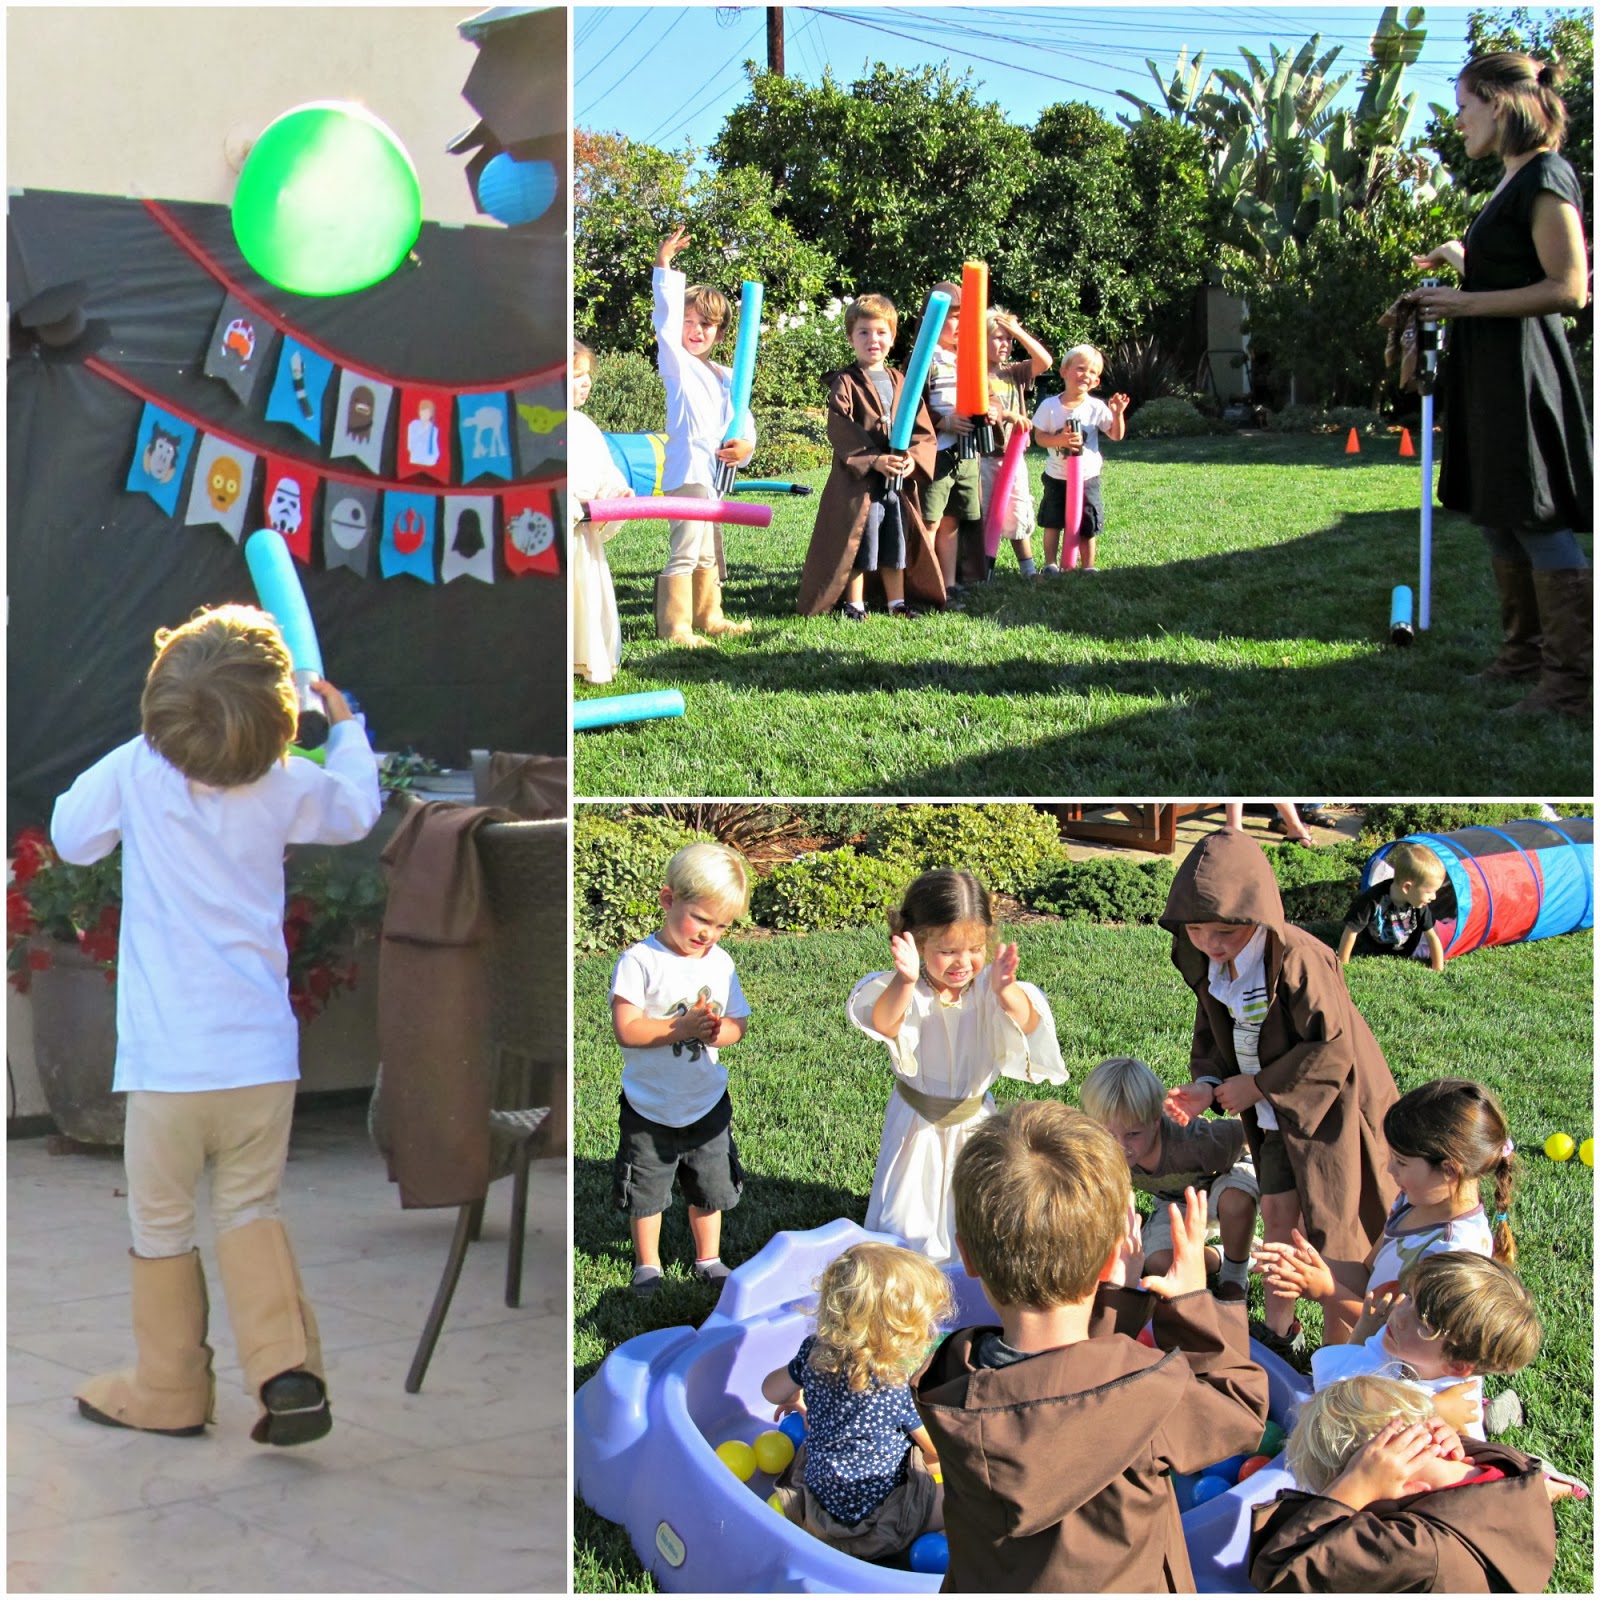
Ok, back to the party. When the young padawans arrived, they each received a Jedi robe and light saber. Dana's Beach Robe pattern was my base, and I Jedi-fied it by widening the sleeves and adding a bunch of length. To save time, I just serged all the edges (no hemming, yay!). There is a button and elastic loop on the front to keep it closed. The lightsabers are the standard pool noodle and duct tape variety. The kids love them and they are pretty safe.
Most of the kids at the party had never seen Star Wars, so "Jedi Master Jill" gave a brief rundown of Jedi and the good side of the force, and they ran through a series of tasks. The padawans had to jump some cones, crawl through a tunnel, rescue a toy R2D2 from the swamps of Degobah (a kiddie pool "ball pit") with their eyes closed, and keep a balloon in the air with their lightsabers.
Once everyone successfully completed their Jedi training, we headed over to the "Tatooine Parlor" to be branded with the Jedi emblem. I used Silhouette Temporary Tatoo paper(affiliate link) to make the tatoos. This is a really cool specialty media from Silhouette, and you don't really even need the cutting machine to use it. You simply choose a design, print on your home computer, apply the adhesive sheet, and cut (by hand or machine).
I didn't go too crazy with decorations for this party, because I knew the kids would mainly be running around with the lightsabers. We strung some mini lanterns and balloon Tie-Fighters, and I dressed up the umbrella pole to look like a lightsaber.
The main decoration was this felt Star Wars bunting, which I I totally copied from Sticks on a Plane. She made the world's coolest Star Wars nursery, and that little bunting spoke to me. I copied most of Amanda's characters, and then did a google search for Star Wars graphic images to create templates for the rest. I kept this decoration a surprise for Oscar, and now it hangs on the wall over his bed. I think this is my favorite element from the whole party.
Food at the party was pretty simple, because this was more of a kid party than a big family barbecue. We had Lightsaber fruit kabobs (which Jared cleverly renamed Obi-wan Kabobies), Cloud City Crudites, Jabba Jello Jigglers, and Empanada's Apprentice Italian sausage hot pockets. My mother-in-law helped me crank out lots of little Darth Vader (sausage filled) and Stormtrooper (ham and cheese filled) hot pockets, using pie dough for the crust, and Williams Sonoma Star Wars cookie cutters (as seen at A Mama with Ideas). Oscar LOVES these things. All the moms and dads thought they were yummy, too. :)
Those cookie cutters served double duty, because obviously we needed to use them for their intended purpose. And the cookies come out so cute, you don't even have to frost them. I used my favorite sugar cookie recipe, and for the chocolate ones, used the same recipe, omitting the almond extract and adding 1/2 cup cocoa powder. They are sooo good, I'm having a really hard time staying away from the left overs.
I always decorate our drink dispenser for parties, but this R2 unit is my favorite vinyl "costume" to date. I cut the vinyl on my Silhouette Cameo, and applied it by hand (I find transfer paper is a little tricky on curves). If you want my R2D2 vinyl file, just shoot me an email (homemadebyjill@gmail.com)! The "head" is just a metal mixing bowl set over the top of the drink dispenser and secured with a little tape.
Other Silhouette media projects included these cute storm trooper favor box labels, made with thePrintable Silver Foil labels(affiliate link). This is one of my favorite specialty media products by Silhouette, because the labels look SO polished. I wasn't sure how color would show up against the foil, but it was vibrant and looked fab. This is definitely a product you could use without the machine, and would be wonderful to use on holiday treats.
I filled the boxes with Star Wars rings and pop rocks candy for each of the guests and their siblings. I was feeling stingy with my cute chevron boxes, so I just packed one for each family instead of each kid.
I used the Printable Clear Sticker Paper(affiliate link) to add Darth Vader to the kid's drink cups. This sticker paper is quite thick, and would look great against glass. It worked on my cups, but would look better on a nice smooth surface, I think.
I also made the star straw toppers on my silhouette using a pencil topper shape from the online store. You have to shrink the shape down a bit to make the holes a good size for straws, but they were pretty cute. It's all in the little details!
Darth Vader (a.k.a., Darth Daddy) showed up and tried to steal all of our pinata candy. He tried to bring Oscar to the Dark Side, promising the pinata candy would bring them great power, but luckily, Oscar was able to resist. He and the other young Jedis gave ol' Darth a good pummeling with their lightsabers, and he surrendered.
I made the Darth Vader costume by ironing on a chest plate image I found online to a long sleeve t-shirt, and sewing a big piece of fabric into the shoulders as a cape. We ordered the accessories from amazon.
Oscar really had his heart set on a Star Wars pinata, but there isn't much available to buy at a reasonable price. Luckily, Oh Happy Day has a whole series about how to make your own pinata, so I just made this one myself. It was so easy! All I needed was a box, painters tape, craft glue, and crepe paper. I added a bit of cardstock for the features. I think it took like two hours to put together, and Oscar was even able to help. The kids did a great job smashing it open, but the face remained intact, so we saved it and hung it on Oscar's wall.
The only thing that held out from the original Hoth party theme was this Wampa Cake, which I saw on Alicia Policia. If you love Star Wars, definitely check out all of her Empire Strikes Back party posts. It looked amazing (and had the coolest pinata I've ever seen. Pinata Luke's hand was detachable. I'm serious.).
It was a very Hoth-y birthday after all.
Many thanks to all our friends who came and made this birthday boy's wishes come true! Also, big thank you to my mother-in-law for all of her help with the food prep (you always save the day!), my husband for being a very punny Darth Vader, and my good friend Sonja for helping me with so many of the crafting details behind the scenes. She should get a blog, don't you think? :)
On to the Silhouette promotion!
You may have noticed that I reference my Silhouette Cameo and specialty products a number of times in my party posts. Aside from my sewing machine, it is my favorite crafting tool! It elevates the quality of my projects and just plain saves time.
Visit the Specialty Media Promo Page(affiliate link) and use the code JILL at checkout to access these great deals:
Silhouette Cameo Specialty Media Bundle for $269.99
or
Silhouette Portrait Specialty Media Bundle for $129.99
So, what comes in the bundle, you ask? You choose your machine, and it comes with:
1 cardstock essentials pack
1 pack printable adhesive kraft paper
1 pack printable clear sticker paper
1 pack temporary tattoo paper
1 pack printable cotton canvas
1 pack chipboard
1 pack printable silver foil
1 pack printable magnet paper
1 pack double-sided adhesive
Basically, you are getting about $30 discount on the machines and $70 worth of free product. It's a good promotion. :)
If you don't need the machine, all Specialty Media is 30% off!
Like I said before, if you don't have to own a Silhouette machine to use the cool specialty media. While I would recommend choosing simpler shapes to cut by hand, the media all works the same ... just print your design and cut it out! I'll be sharing other specialty media projects throughout the promotion to show how neat this stuff is.
First, print and cut out the pdf template (please select the "fit to printable area" option to get the correct sizing). Get the template HERE.
Prepare your vinyl - I used my Silhouette machine to cut a design (for Silhouette users, this design is called "Butterfly Floral Lace Square"). You could also buy pre-cut vinyl, cut it by hand, or substitute pretty contact paper (there are some great contact paper patterns out there these days). In my last post, a reader suggested using scrapbook paper and mod podging it to the wipes case. I've never tried this, but I'm sure it would work!
Lay the template pieces on top of the vinyl, and using small pieces of scotch tape to hold them in place.
Cut around each template to get one back piece and two front pieces.
Apply the vinyl to the wipes case, according to the material's instructions. If you are using an intricately cut design, I would strongly recommend using transfer paper.
I used some of the leftover scraps to apply little pieces to the center case flap.
Make sure you firmly adhere the vinyl to the case, smoothing down all corners, and you're done! Enjoy your one-of-a-kind wipes case.
And one more time ... here's another link for the wipes case template, in case you missed it. :)
p.s. if you want to buy a vinyl decorated wipes case, check out Starr Designs on etsy. She makes a variety of decorated and personalized wipes cases, including this butterfly lace design.
There is no fooling you guys - most of you were spot on with your guesses about Ruby's costume in the last post. I'll wait until I've actually sewn something wearable before I make a reveal though Snow White or Wonder Woman? I'm sure you'll lose sleep over the anticipation. :)
This week I made a diaper wipes case for a friend's baby shower, but I wasn't in the mood for hot-gluing (every once and a while I like to save my fingertips).
Instead, I got out my vinyl and cut an all-over pattern using my Silhouette machine. The front had the pattern only, fudged slightly on that center flap.
The back has the same pattern repeated, and the mommy-to-be's last name in the center. I doubt she'll ever grab the wrong case at the playground now.
You don't need a Silhouette to make one of these (although that certainly makes the process quicker and more precise). Vinyl can always be cut by hand, and I think even Contact Paper would work well. I recommend using a premium or outdoor vinyl if you can get your hands on it, since the adhesive is stronger and hold up to more abuse.
I saved my template pieces for the front and back of the case, so let me know if you'd like me to post them! UPDATE: You can find the wipes case template posted HERE.


 My Oscar was appropriately grouchy at the beginning of the party until he was allowed to wander off with one of the table decorations (which was filled with "Dorothy"goldfish crackers).