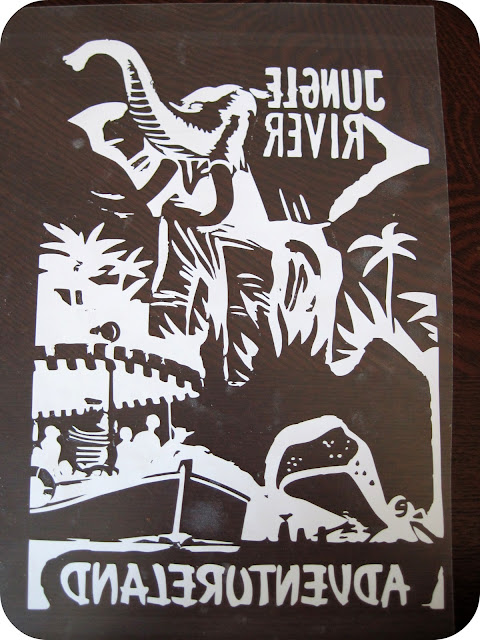
It took me a few days to get back into the swing of things, but we are back to real life and now I want to show you the t-shirts I made for Oscar.
Last fall, Dana from MADE posted about some Disney shirts she made for a friend using freezer paper stencils, and in passing, mentioned how cool it would be to use the images of the retro-styled Disneyland ride posters to make shirts. A brilliant idea (as her ideas usually are). The designs are far too intricate to cut out by hand (at least for me), but this is the perfect project to do on the Silhouette.
I started with an image from the Jungle River cruise ride:
The most common questions I get about the Silhouette are:
- How do I import my own images?
- How do I trace images to get cut lines?
However, it won't automatically have cut lines. That's where the tracing feature comes in. Open the Trace menu and click on Select Trace Area. You will then be able to click and drag a rectangle around your image to select the area. Once it is highlighted, adjust the trace settings to get the image how you want it to be traced.
Then you choose your trace method. For this project, I just clicked Trace, and it does all the lines. You can also trace the outer edge only (for something line a silhouette of a face), or you can trace and detach. The trace and detach feature doesn't add cut lines, but instead separates whatever you've traced from the rest of the image, in case you want to isolate something.
Once the image is traced, the red cut lines and the original image are separate and you can drag them apart easily. I used the eraser in the tool bar to clean up some of the lines and removed some of the small text that wouldn't trace clearly.
If you have text in your image, don't forget to flip it horizontally before cutting, otherwise all the words will be backwards and you will be very sad. Ask me how I know. :)
Then I cut the image out of the Smooth Heat Transfer material on the Silhouette. For an intricate design like this, I recommend slowing down the cutting speed to a 3 or 4. It just seems to produce better results.
Peel away all the negative space around your cut image. I LOVE the little hook tool to pick up small pieces (and to hold little pieces in place that I don't want to come up). I don't think I would have been able to pull the negative space away without the hook on this project.
Here's what it will look like when it is all done:
Then place it on your shirt. The heat transfer material works very well when you follow the directions. Set your iron to the Cotton Setting (and no higher, or it can ruin the heat transfer), and make sure you use a press cloth so you don't melt the plastic. I just use a thin scrap of cotton jersey, and it works very well.
After I peel away the protective plastic, I typically cover it with the press cloth and iron it again, just for good measure.
Then you can sit back and enjoy your totally cool, one-of-a-kind t-shirt that is sure to be the envy of Jungle Cruise lovers everywhere.
Don't sit back too long though, because you should probably make another shirt or two. :) Lightning McQueen is a celebrity and hero at our house. Did you know that you can layer different colors of the heat transfer? Because you totally can.
I didn't get any good action shots of Oscar in his shirts, but this was the face he wore all weekend:
He was one happy boy.
One more Disneyland post with more girl outfits coming up later this week!


